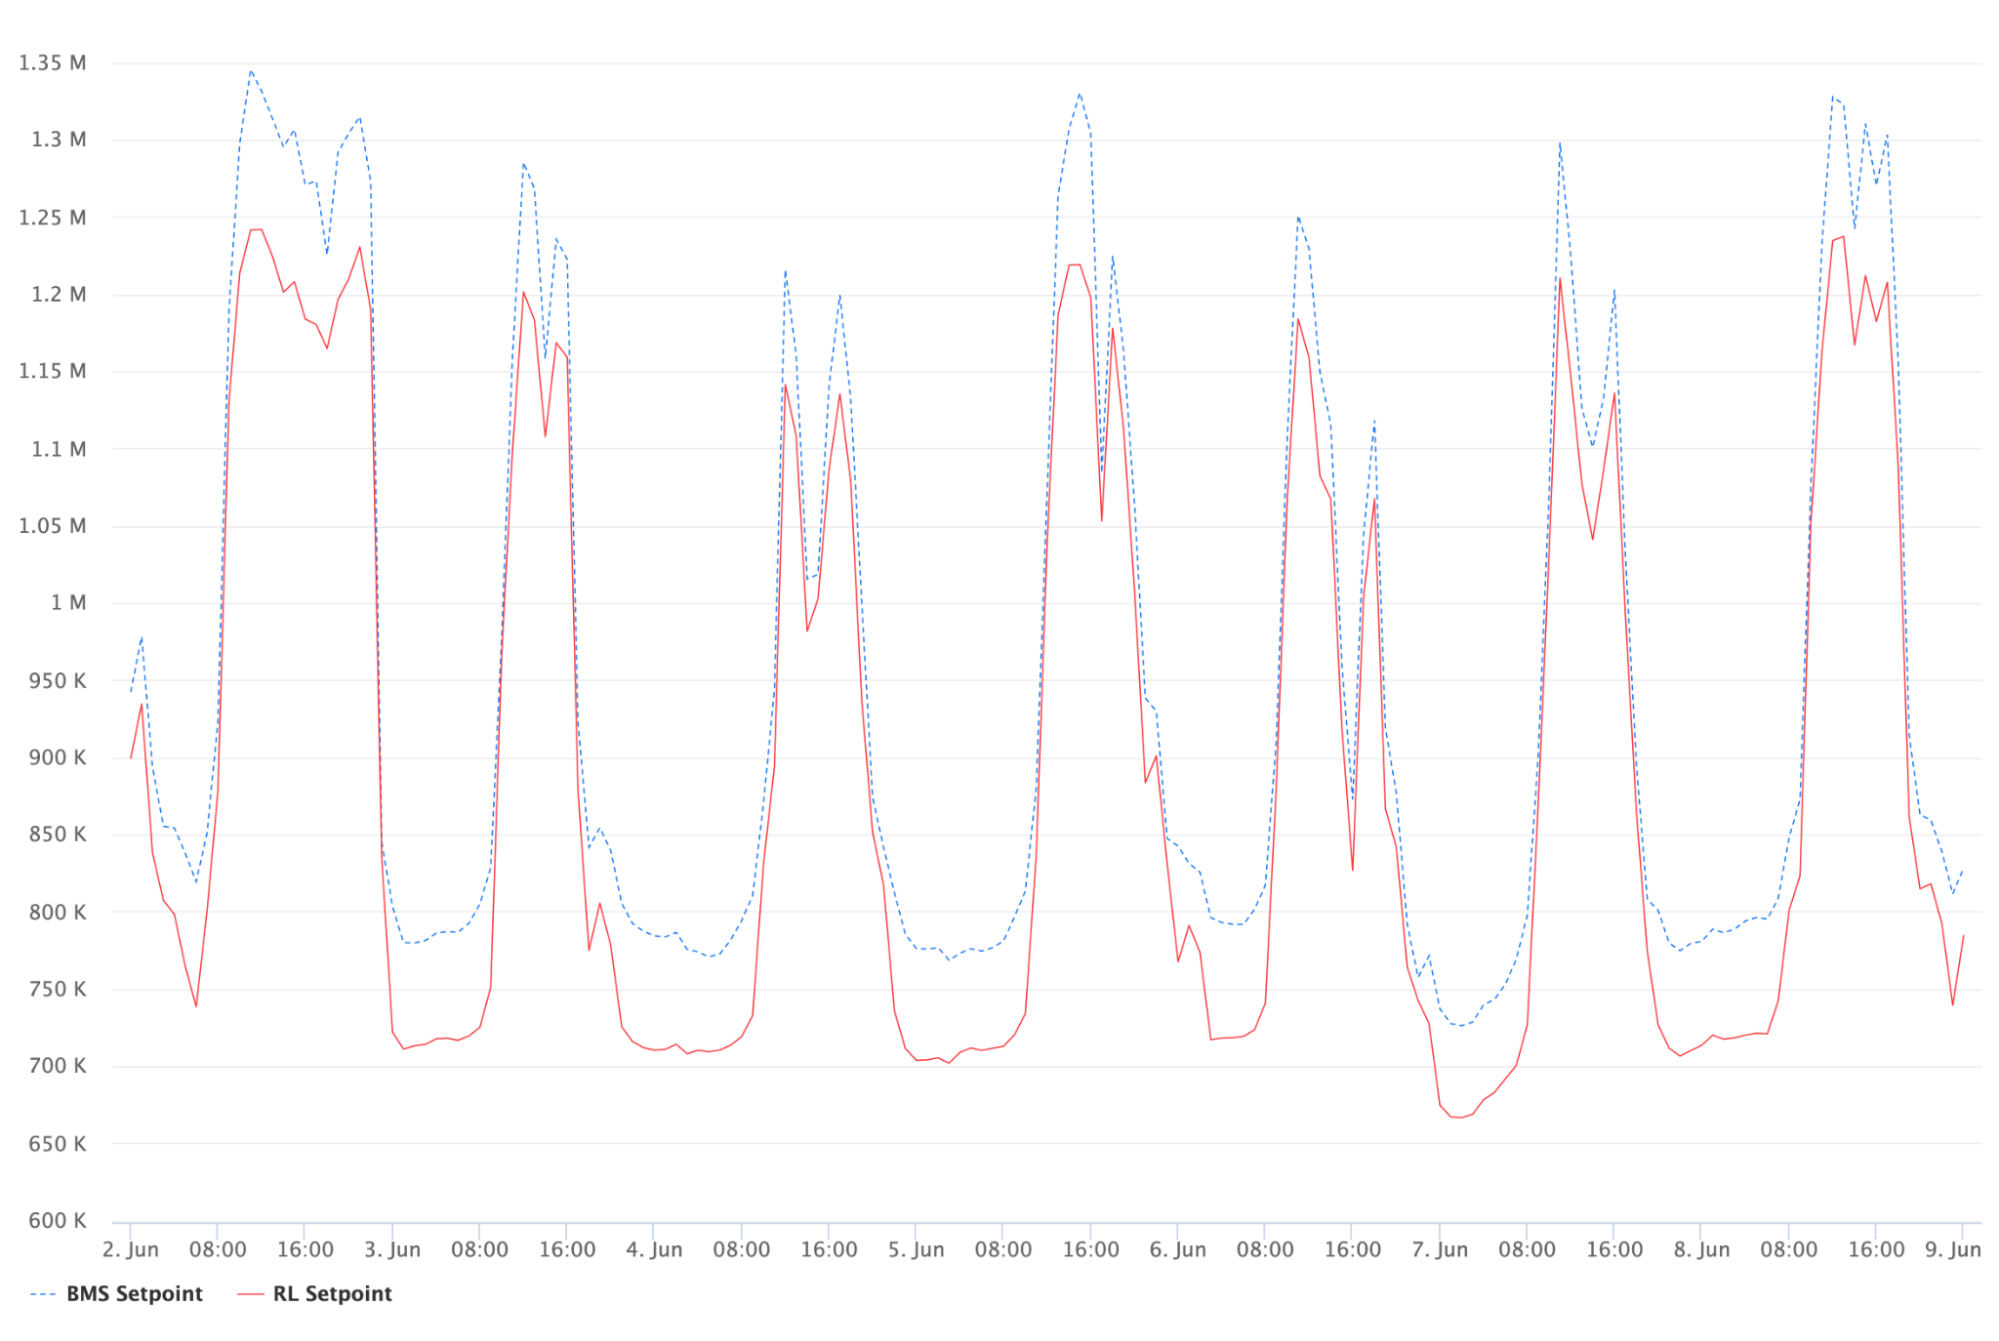
Figure 3. A comparison of the RL model versus the original BMS setpoint.
Meta believes in building community through open source technology. Explore our latest projects in Artificial Intelligence, Data Infrastructure, Development Tools, Front End, Languages, Platforms, Security, Virtual Reality, and more.